How to Add Music from iTunes to iMovie on Mac
iMovie is an extremely easy to use video editor to weave your videos, photos and music into stylish movies without effort. Generally, it's easy to add music to iMovie, simply drag and drop a desired song from Finder to iMovie, and it's done. For those "compatible" iTunes music, you can add them to iMovie by doing these:
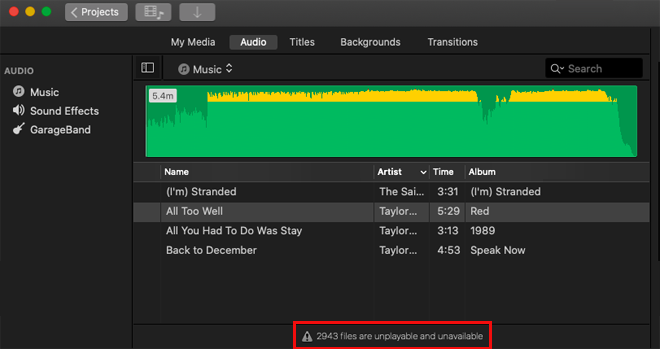
- After you opened your iMovie project, click the Audio tab and choose Music or iTunes in the libraries list. You could see all available music there.
- To preview your music, click the play button next to each song. To add your favorite song, drag it from the media browser, and when the plus sign appears, drop it to the timeline.
This is how you could add music from iTunes to iMovie on Mac. Easy enough. But how about the music you want doesn't appear in the list? For example, the Apple Music or iTunes purchased songs. So you may ask:
Why can't I import music from iTunes to iMovie?
To use your iTunes music in your iMovie project, you have to be the copyright holder of the song or have express permission from the copyright holder. Any DRM (Digital Rights Management) protected music could not be added from iTunes to iMovie.
So is there any way you could add any music from iTunes to iMovie? The answer is YES. What you need is an iTunes Audio Converter. Thanks to the advanced record technology, you could record unencrypted iTunes music and use it in your iMovie projects flawlessly.
Key Features of Sidify iTunes Audio Converter
- Record DRM-protected iTunes music, Apple Music, iTunes audiobooks, etc.
- Convert Apple Music to MP3, AAC, WAV, FLAC, AIFF, M4A.
- Convert iTunes audio without quality loss.
- Preserve the original ID3 tags information.
- Intuitive and clean user interface.
How to Use Apple Music Converter to Add iTunes Music to iMovie
Sidify iTunes Audio Converter will help you create DRM-free music so you can import to iMovie to set as the background music, or play music anywhere you want, like MP3 players, iPod Nano and PS4.
Step 1: Download and Install iTunes Audio Converter
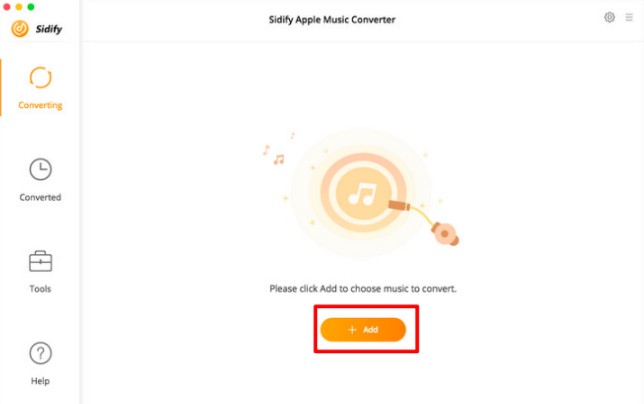
Sidify Apple Music Converter for Mac is free to try. Just download Sidify Apple Music Converter and install it by following on-screen instructions step by step. When get it launched, you'll see the tidy user interface as below.
Step 2: Import iTunes Music Files
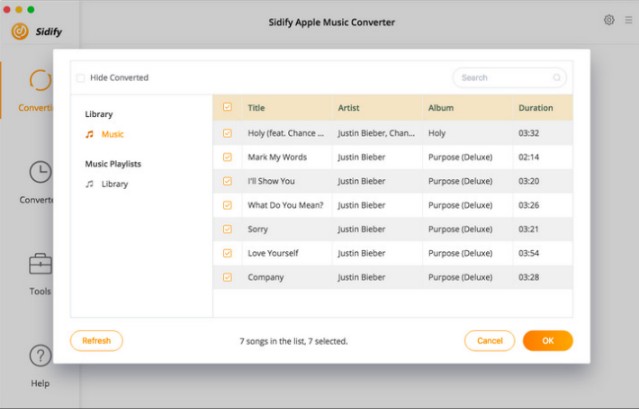
Click the button "Add" to display all your iTunes folders. You can then choose Apple Music files, audiobooks, and M4P audio for converting to DRM-free versions. To specify a song, type keywords in the search bar on top. Optionally, directly drag & drop the music from iTunes / Music app to Sidify Intuitive enough!
Step 3: Choose Format and Start Recording
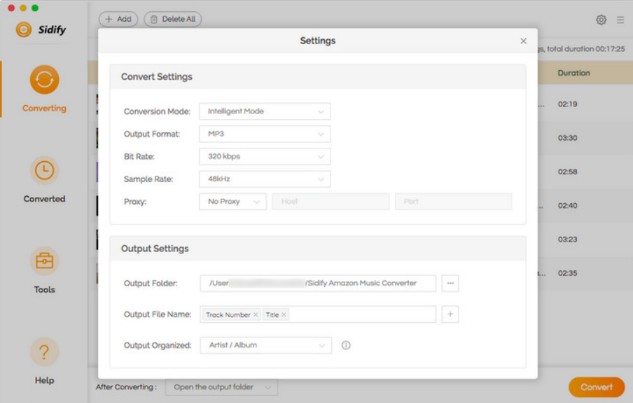
Click the Setting button on screen to bring up the Settings dialog. Here you can the Conversion mode, set the destination folder, and the audio format. MP3, AAC, FLAC, AIFF, WAV, and ALAC are fully compatible. When finished, close the dialog and then click Convert to start recording your iTunes music to DRM-free files that you're able to use anywhere.
Step 4: Add Music from iTunes to iMovie
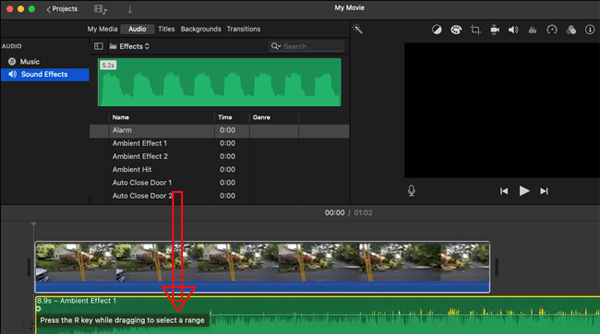
Now your iTunes music are stored on your hard drive. You need to import them to iMovie library first. To do so, click the Import (down arrow) button in iMovie and navigate to the folder with your desired music. After importing to iMovie, you could drag and drop it from the media browser to the timeline.
Conclusion on Adding iTunes Music to iMovie
For iTunes purchased music without DRM (copyright restriction), you can easily add to iMovie set as the background music of your emotional movies. However, if those music involved in the Apple Music, they are protected and you're prevented from using them in iMovie. You could see iMovie's notification: # files are unplayable and unavailable. But with the help of music recorder like Sidify iTunes Audio Converter, you could add any music from iTunes to iMovie with ease.
FAQs on Adding Music from iTunes to iMovie
What music file format are supported by iMovie?
You can add music files in the format of M4A, MP4, MP3, AAC, WAV, and AIFF from your external hard disk drive, iCloud Drive, or other locations.
iTunes music not showing up in iMovie
Apart from the DRM issues, there are also other reasons why your iTunes music doesn't show up in iMovie. Do smart troubleshooting as below:
- Go to iTunes Preferences and allow your iTunes library to share with other applications like iMovie.
- iTunes songs stored in the cloud will not display in your iMovie project before you download them to your iTunes Media Library on your macOS. After downloaded to your Finder, drag and drop them to iMovie to import to your iMovie library first.
- Note that all Apple Music won't show up in iMovie even if you've subscribed and downloaded it to iTunes. To use Apple Music in iMovie, Sidify iTunes Audio Converter is exactly what you want.
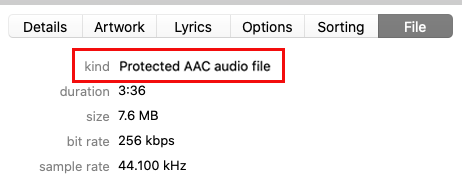
How do you know whether an iTunes song is protected or not?
To check which songs are DRM protected, launch iTunes and go to View/View Options and click on the box labeled "Kind" under the "File" subheading.
iMovie for Windows | Download | Privacy Policy | Contact Us | iMovie Blog | Store |
Copyright ©
iMovie For Windows Dot Com. All rights reserved.
Browser compatibility : IE/Firefox/Chrome/Opera/Safari/Maxthon/Netscape

